Table module: C15_Table
This module enables presenting information in a well-structured way. Sorting the information in cells, rows and columns makes it easy for the user to consume the information.
To structure data on your website and show them in a table, you can use the C15_Table module in magnolia.
A use case could be to just have an overview of structured links in a simple table with just 2 columns for example. Another use case could be more complex data in a more complex table. Both use cases can be covered with this one module.
Creating a table

First, after inserting the module on your content page, you need to define the number of rows and lines you would need by clicking on the table icon and select the amounts.
Hint: while the system language is always English, the Dialogue window here is aligned to your browser language.
Zeile = row
Spalte = column
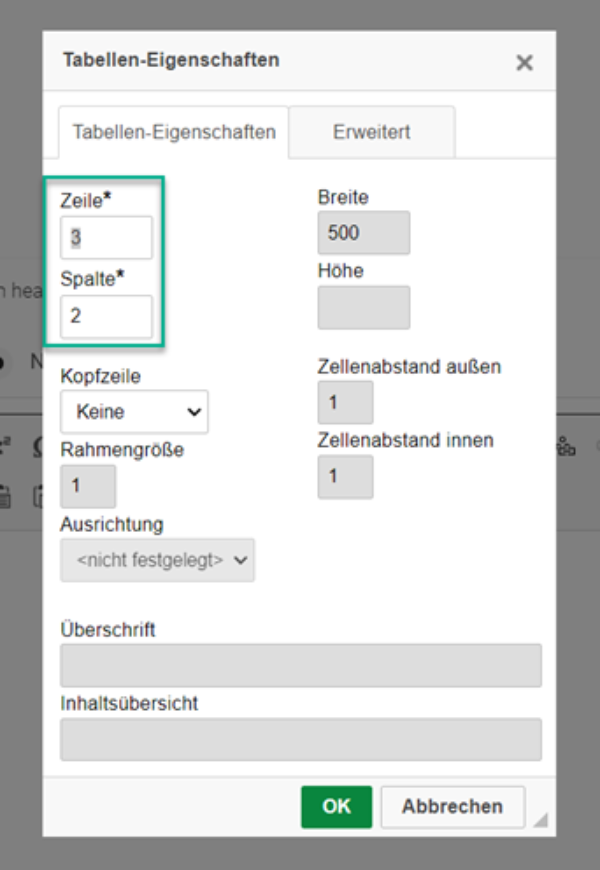
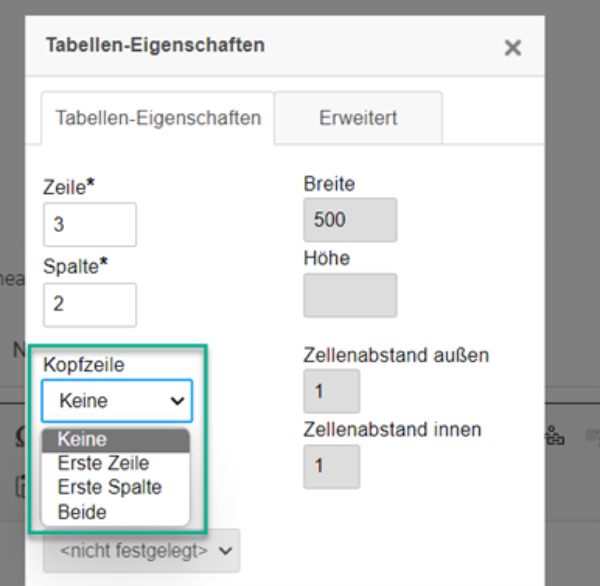
In the same step you can define, if the first row, the first column or both of them should be coloured to highlight it as “table head”.
Hint: while the system language is always English, the Dialogue window here is aligned to your browser language.
Erste Zeile = first row
Erste Spalte = first column
Beide = both
Then you start to enter your content. This could be just text, but also links are possible.
Please click into one cell and start entering your content.
Note: the width of the cell behaves dynamically while you are typing. But later in the design they all have the same width.
Formatting options
Let´s have a look into the most used formatting options:
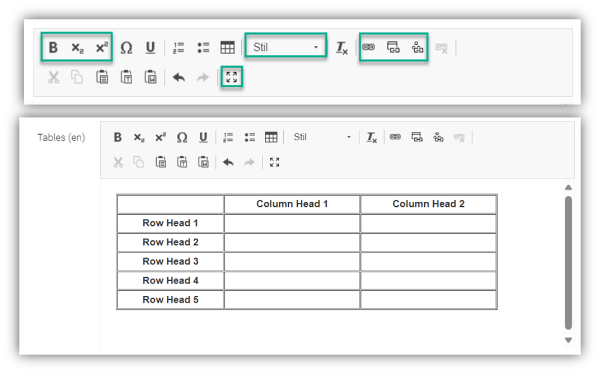
- B Bold, x2 Subscript, x2 Superscript
- “Stil” gives the opportunity to set specific text into smaller font, e.g. for a foot note or reference.
- Expand the window to see the whole table in full screen. In case it is more complex that makes it easier to edit the table.
- Links: external link / edit link, link to magnolia page, link to asset (download)
Let´s have a deep dive into the link options:
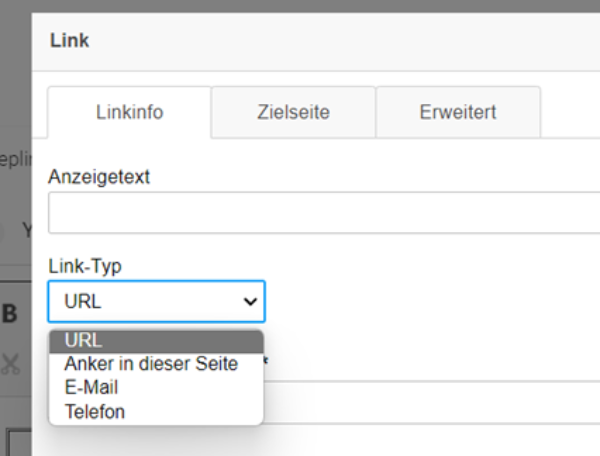
If you insert an external link or if you like to change any link settings, please mark your link and click on the paper clip icon.
First, you can choose the link type via dropdown within the tab “linkinfo”.
Under the tab “Erweitert / Extended” you can influence the styling of the link:
- You might need to mark an external link as an internal one, then you choose “Internal”. The icon of the link in the frontend will show the internal link icon.
- Or you might like to present a link as a prominent button, then you choose “CTA” as styling option.
NOTE: Your link in the table does not look correct? If you copy links from third party systems, you might need to adapt the link styling to show it correctly.
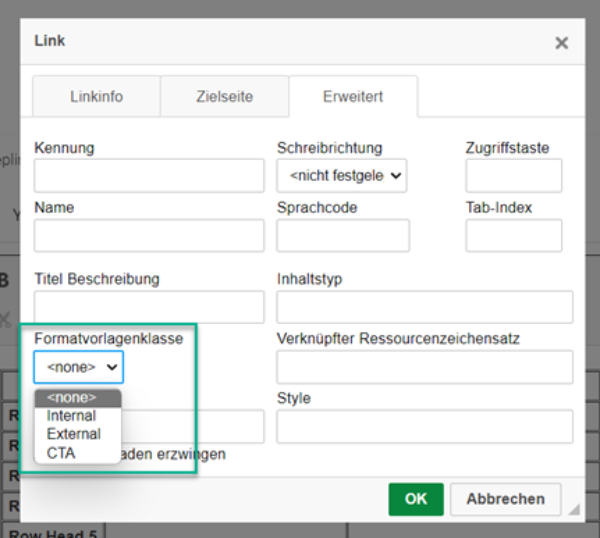
Adapt the table configuration
To insert another row or column afterwards, you need to
- Click on a cell,
- Do a right click to open the context menu.
- There you can select options to insert another row or column.
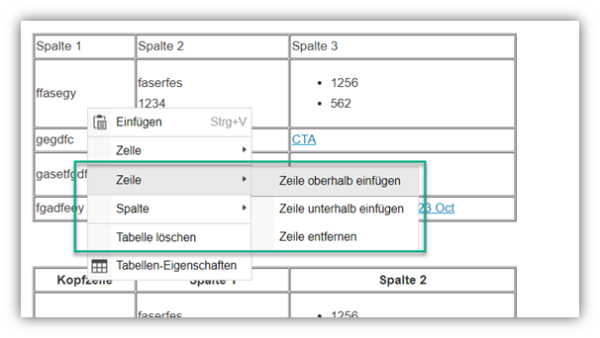
Example 1 - Simple Table
| Product | New Vendor |
|---|---|
| UV air purifier (Soluva) | IOS/ Virewall |
| Gas Catalytic Infrared Systems | VulcanIR |
| Dental products | Kulzer |
| UV lamps | Excellitas Noblelight |
Example 2 - Technical Data
| Product A | Product B | |
|---|---|---|
| Length (mm) | 16 | 9 |
| Particle size (nm) | 8 | 8 |
| Silicon dioxide content (%) | > 99.99 | > 99.99 |
| Surface area (m2/g) | 30 | 20 |