Assets App
The Assets app is the central storage in magnolia to maintain all media and documents that need to be embedded on the content pages of the website.
All the images, mood videos and documents, you like to insert on the content pages, need to be uploaded and published with some definitions in the assets app. The structure of the assets within the app can be completely individual. You can set up an indiviual folder structure that fits to your business organization. By clicking on "add folder" on the right hand menue you can create folders and name them individually with "rename folder".

Asset upload
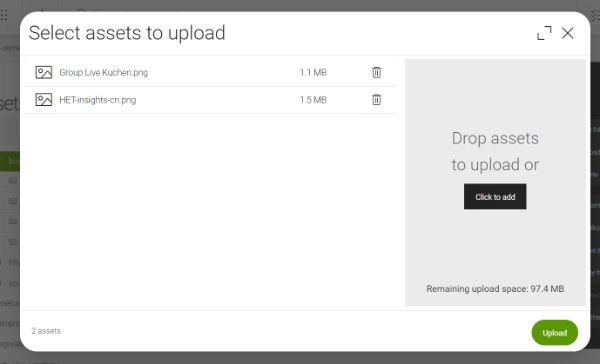
To upload a file, please select the folder for storage and click on "upload asset". In the dialogue window you can either drag and drop the files from your desktop or just use "click to add" files.
HINT: Please be aware that the assets have a file name, that is already optimized for SEO before the upload, as the asset name will be equal to the file name after the upload. The file name should not use capitals, special characters or underlines. Further the original size of the image should be web-optimized. A resolution of 2000 Pixels is recommended for images.
Now your assets are uploaded and need to be edited. You can start by a double click on the asset or just use "edit asset" on the right hand menue.
Edit assets
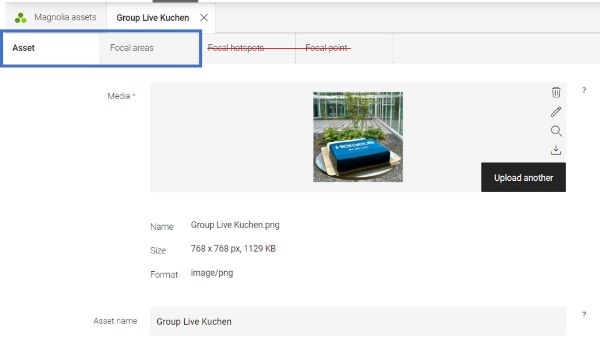
There are just two tabs relevant for Heraeus editors: the general assets information for images and documents as well as the focal area specifically for images.
Within the general asset information you can not only add several meta information, but also
- preview the asset in a lightbox (only for images),
- download the asset,
- edit the asset (only for images) or
- upload another asset (version).
Especially uploading "another asset" can be interesting, if there is a new asset version available and you like to keep all the defined meta data and references on the website from the previous version. Especially for documents this is used quite often.
Meta data fields with high impact
Asset: Image
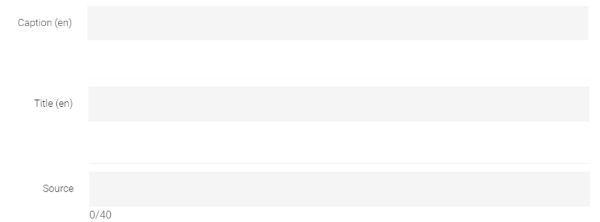
At least there are three most important meta data fields for images, that are shown in the frontend of your website and will be defined centrally. That is why the editor should maintain them mindfully.
- Caption: the caption is an option to underline the content of an image. In case of a group of persons this could be the names or in case of an application this could be further explanation of what is exactly shown on the image.This field is language independent and can be maintained separately in each language.
To adapt the title in the context of content, it can be overwritten within the content of the page modules, but this is just recommended if it is really necessary. This centrally defined title is always the default value. - Title: the title is the Alt-Text or also know as tooltip that is shown with the mouse-over of an image and it is crucial for search engine and accessability criteria.
This field is language independant and can be maintained separately in each language.
To adapt the title in the context of content, it can be overwritten within the content of the page modules, but this is just recommended if it is really necessary. This centrally defined title is always the default value. - Source: depending on the image it could be mandatory to name the source of the image. For example the name of the photographer, name of the customer or in case of stock material the respective information. So please add the source centrally in the assets app. Then it can be shown directly on the image.
Asset: Document
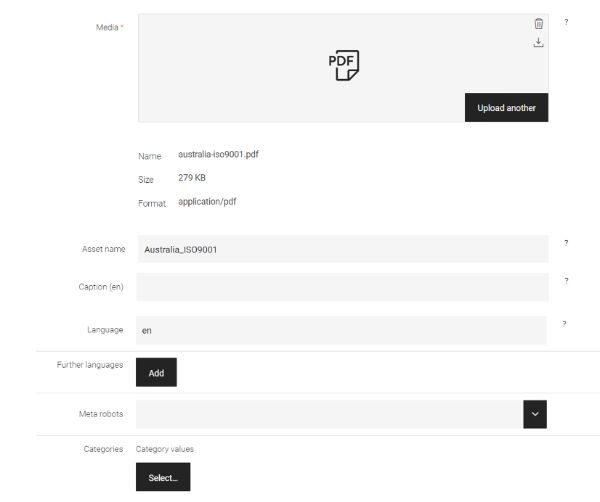
For documents there are three meta data fields, that have an impact to the functionality on your website and will be defined centrally. That is why the editor should maintain them mindfully.
- Language: please insert the language of the document in short form like en or de. The language of the document is shown in the download item.
- Further languages (for search index): the global search usually shows just content and assets for the respective language version the user is visiting. In case you like to show the document in the search result of another language website version, you can add these further languages here. (Example: show the en document also in es website, then you add es as further language)
- Meta robots:
index + follow: the document can be shown in the Google search result and Google can use the document links.
index + nofollow: the document can be shown in the Google search result, but we do not allow Google to follow links.
noindex + follow: the document cannot be shown in the Google search result, but we allow Google to use links.
noindex + nofollow: we do not allow Google any usage of the document, so the document cannot be shown in the Google search result. - Category (OpCo specific: currently just used by HEN)
Focal areas
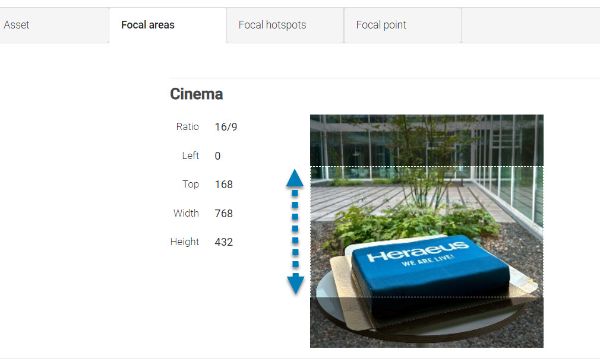
Images are used in a lot of different variants on the website within various content management modules. This could be in big size for a stage for example but also as a teaser image in smaller size. Further the amount of different devices on the user side require a responsive behaviour of the website images. To cover all these variant requirements the system is taking over the resizing on its own. But as an editor you have the option define at least the so called focal area of an image, that the right image content is shown while resizing it.
For the HeraeusWeb solution there are four resolutions pre-defined:
- Cinema with image ratio 16/9
- Portrait with image ratio 3/4
- Landscape with image ratio 3/2
- Landscape with image ratio 4/1 (OpCo specific: currently just used by HPM)
Recommendation: depending on the intended use of the image, the original uploaded image size should cover the different resolutions.
To define the focal area just draw the given image cutout to the right position.
Publish assets
To insert and see the assets out of the Assets app on a content page, you first need to publish them. Therefore please select the asset in the list and click on “publish” in the right hand menue.
Please be aware, that you can only publish assets as soon as the folder is published as well. To do an entire publication of a folder you can "publish incl. subnodes".

